Away from the greasy, gooey, gunky mechanical part of the car and back to the real dirty stuff. You remember how dirty my seats were, right?
Here's my method of undoing all that nastiness. I've used a lot of products on a lot of interiors over the years, and this is what works best for me. It works well on leather and vinyl, though you'd want to be careful is dealing with really old and dry interiors. First thing, hose the whole thing down with Simple Green.
Scrub it up, wipe dry, and repeat as necessary. Here's how it looks after three rounds of scrubbing:
Better, but it's still pretty dirty. The problem is the texture of the material. While the surface is clean, the grain of the material is still full of dirt. The best way to get this out is with a toothbrush. Seriously. I toothbrushed the entire seat. Also, don't use your real toothbrush, use an old one.
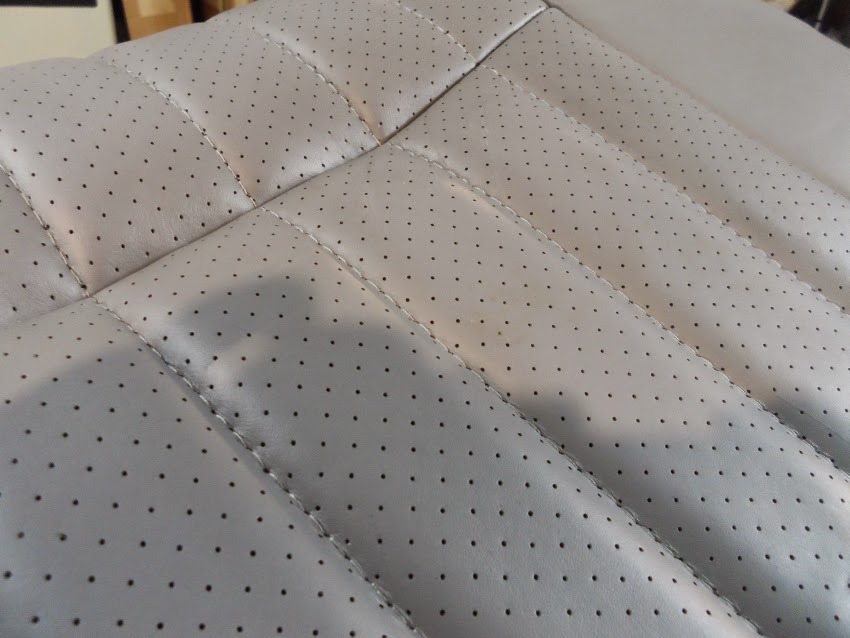
A Mr. Clean Magic Eraser works wonders too. Here we are after many scrubbings and Magic Erasings:
Normally, this is good enough. Not this car though. I don't know what the guy was carrying in his back seat, but it was something. It was almost like tar, but wasn't. It left stains that required more persuasion.
The first solvent I always try is mineral spirits. It's very mild and shouldn't do any harm to the material. I've tested it on hundreds of leathers and vinyls, and I've never had it cause any damage. As always, test in an inconspicuous spot first just in case.
Mineral spirits got most of it off, but not all. So, I started working my way up the solvent chain to harsher solvents. You have to be extremely careful doing this, if you're not careful, this WILL RUIN YOUR SEATS. These stains were incredibly stubborn and I ended up using just about the harshest solvent out there, MEK. MEK WILL melt vinyl, and WILL strip the color off the leather. You must be quick with it, it can't sit on the material for any length of time, just quick wipes. It's VERY easy to mess up and ruin your seat. The MEK did the trick and lifted the stain out(or at least 95% of it, you can just barely see it if you know where to look).
Congratulations, you've successfully cleaned your seats. You've also removed up any built up Armor-All or other "protectants" people have applied over the years. You've also stripped some of the leather's natural oils. We need to put all that back. The internet rages over what products work best. My preference is Lexol for the leather, and Mother's VLR for the vinyl. The VLR is nice because it doesn't dry shiny. It gives you a nice satin look, not the plastic look Armor-All and similar silicone based products leave. Since the Impala's leather is perforated, I put on way too much Lexol, then rub it in down through the holes. This way, it helps condition the leather from both sides. When your done, you'll have a nice, clean, well cared for seat.
Sunday, November 30, 2014
Monday, November 3, 2014
I'm feeling super lazy, which is like regular lazy, but I'm also wearing a cape.
Preventative maintenance time. At 164K miles, I question the life left in the Impala's fuel pump. I had one go bad in the Caprice with far fewer miles. The guy also said that the gas gauge reads 1/4 full when it's actually empty. Substandard fuel pump wiring and sending units that go out of whack are both common problems on these cars, so I decided to take car of them both. I didn't want to reinvent the wheel, or cover territory that someone else has already done. So, for this post, I'm not going to go into too much detail. Suffice to say, I did THIS and THIS. I used an Airtex pump harness with a new Delco fuel pump, they're pretty cheap on e-bay. If you read the second link, you know about the fuel sender wiper getting dirty. Here's mine. Gee, can't imagine why it might not read accurately...
I also discovered another minor problem. The fuel return line had come unsoldered from the cap. Judging by the rust and buildup on the top of the sender, it has been like this a while. That would explain the faint fuel smell when driving around on a full tank.
I clipped the line back into the clip, and resealed the connection with Seal-All. It may seem hokey, but trust me, it works. Seal-All is fuel resistant and sticks to about everything. I've used it to repair actively leaking radiators, and even a roadside repair on an actively dripping fuel line that rusted through. The stuff is simply amazing.
While I had the tank out, I took the opportunity to do some rust prevention too. All the metal under the tank was painted with Eastwood's Rust Encapsulator, then sprayed with Amsoil's HD Metal Protector. The first seals and kills any existing rust, the second leaves a self healing water repelling waxy coating on the surface. All the seams, nooks, and crannies get a liberal coating of it, as well as an overall coat of the whole area. The metal parts of the fuel pump module got a coating of HDMP too.
Tuesday, October 28, 2014
I wander what's wrong
Cosmetically, the Impala is in terrible shape. Mechanically though, it's pretty good. It is however a 164,000 mile car. At that mileage, stuff is bound to be worn out, particularly if parts of it haven't been properly serviced. Case in point, my outer tie rod ends. While they are greasable, one side had the grease fitting broken off. It was pretty loose. It's easy to check, have someone move the steering wheel back and fourth while you look at all the steering system joints. If you see any play, the joint is bad. While one side was ok, the other was on the verge of failure, so I decided to replace them both.
First things first, any time you monkey with the steering system, you need to recheck the alignment. The method shown here will often get you close enough. The first thing I did was use my calipers to measure the length of the original tie rod end. I measured from the edge of the adjusting sleeve to the center of the grease fitting(or, at least where the grease fitting used to be).
Then I used a tie rod puller(which is actually a pusher) to remove the tie rod stud from the knuckle. I picked up my puller at Harbor Freight. It was cheap, and it works great. Alternatively, you can use a pickle fork, but I find the puller is easier. If you don't want to buy one, they can be rented from many auto parts stores through their tool loaner programs. Notice that I still have the nut loosely on the stud. Sometimes it takes a whole lot of force to break them loose, and this keeps the tie rod from flopping to the ground when the stud pops.
You can see here just how bad this joint was. There was no more grease in it, and it had tons of play in it. It could have broken at any moment(also, no the pic isn't backwards, this is the other side, the worse of the two).
A vice grips on the shaft and penetrating oil on the sleeve threads will help get the old end out. With the old rod end unscrewed, the new one gets screwed in. Using the calipers, the new end is adjusted to be the exact same length as the original. The threads of the adjusting sleeve also get a very heavy coating of antisieze so they aren't too stuck when it comes time for an actual alignment.
Repeat for the other side, and that's all there is to it. No more wandering, and no fear of careening to your death with every pot hole. Once both sides are done, you can verify your toe settings with a tape measure. While not laser accurate, the tape measure method works fine for most people. Next summer, I'm going to replace the rest of the suspension/steering joints, and I'll get an actual alignment then.
You might also notice that the sway bar bushings are gone, and the bumpstops chewed up. We'll deal with those in a future post.
Wednesday, October 22, 2014
Where's my Hazmat suit?
It doesn't matter what rubber gloves cost, or how many I go through. They are a necessary part of this project. I don't mind getting my hands dirty, but this car was disgusting and gloves were an absolute necessity. The Viper had a dirty interior when I got it. This car was leaps and bounds worse. As I previously mentioned, the former owner of this car was a "larger gentleman with poor personal habits." I don't think the guy was aware that car interiors are something that can actually be cleaned. I mean, you saw the carpet. I felt like I needed a shower or three after just driving it home. Getting everything clean is a big part of the reason I ripped the entire interior out. Everything needed to be scrubbed, rescrubbed, and scrubbed again. Dawn, Simple Green, and a Mr. Clean Magic Eraser are absolute necessities for things like this. Here are just a few examples of just how dirty this car was. After leaving a few clean spots, the difference is ridiculously huge. The seat and center console seen here are representative of how dirty the whole car was. Gross. Just gross. And it's not like this is a $500 beater that you wouldn't care about, it's an Impala SS...
Saturday, October 18, 2014
At my age, it's not surprising that I need a rug.
The original carpet in the Impala was a write off. I decided that
before I even started taking the car apart. Once it was out, it went
straight to the dump. I'm surprised they didn't charge me a hazmat fee.
I got a new carpet made by Auto Custom Carpets. Rock Auto actually
had the best price with shipping, so I ordered through them. This giant
carpet comes in a tiny box, so the first thing I did was unfold it and
leave it sit in the living room for a week to start relaxing the
shipping creases. Then I set it in the car, and let it bake in the sun
for a week. This type of press molded carpet has a plastic backing that
softens with heat so for the really stubborn creases, I used the heat
gun to soften the backing and worked the creases out. I installed the
carpet from back to front, using the rear footwells as my starting
point. For what the carpet cost, the fit was "good," but not "great." I
spent a day fitting it, though if you've never installed a carpet like
this before, plan a whole weekend. The only place I used glue was the
rear footwells, and that was mostly to hold it in place while I was
fitting the rest. Since it's heat moldable, I could have spent more
time tweaking it for a perfect fit, but for this car a good fit is more
than good enough.
Thursday, October 16, 2014
This just floors me
So the carpet is out, and the interior stripped, what's a guy to do? Take preventative action of course :) The floor in the Mighty Caprice™ rusted from the inside out. The salt water dripping off my boots for ten years took it's toll. I didn't want a repeat performance with the Impala. It's very rust free, and I want it to stay that way as long as possible. There was just a little bit of surface rust starting to show on the floor. Here it is after a through wire brushing:
To stem the rust that's already there, I wanted to use a rust inhibiting coating. There are many on the market that actually kill any existing the rust, and help prevent new rust. My product of choice is Eastwood's Rust Encapsulator Way back when, I used it on the bottom of the Mighty Caprice™. Several years later when I had to replace the trans, you could very clearly see on the driveshaft which side was facing down and got painted. The Rust Encapsulator works well, and isn't as hazardous to your health as some products like POR15. I painted all the rusty spots, and places that might rust in the future:
I know from the Mighty Caprice™ that the rockers and base of the B pillars will rust too. This inside out rust is the hardest to prevent because you can't see it, and you can't really get to it. One of the things I'm going to do is back coat as much of the car as I can. My primary back coating is Amsoil HD Metal Protector. It sprays on thin and penetrates down into cracks and seams, then dries into a tough, waxy film. While I had the interior out, using the little red hose on the can, I sprayed around inside every screw hole and opening I could find, and it only dripped out the bottom in a few spots. I used a can and a half just inside the rockers, A and B pillars, and the part of the rear wheel arch inside the door jamb vent.
Wednesday, October 15, 2014
Keeping my hose in line
If you recall, I replaced the power steering pump on the Viper some time back. The new pump started making a bit of noise the other day, and, not being the type to let things go too long, I checked it out. Turns out, I was low on fluid. Here's why:
That's the power steering return line to the reservoir. In the past few months, it's cracked and split. Undoubtedly it was initially damaged when I removed it to replace the pump, I just didn't notice, and it got worse from there. It didn't help that it's 17 years old. This particular line goes from the PS cooler to the reservoir and is so easy to replace, I didn't bother taking more pictures. Since it's a return hose, it's not one of the special crimped high pressure lines. Just take the airbox out, suck the fluid out of the reservoir with a turkey baster, undo the quick clamps, remove and replace. Everything is easily accessible once the airbox is out of the way.
Actually getting new hose was a bit interesting. It says right on it that it's 11/32" PS return hose. So I went to Advance Auto to get some more. Turns out Advance doesn't sell PS return hose in bulk, they sell it in individually bagged 1' and 2' sections. Because of this, even though I told them what size I needed, they actually had to look it up on the computer. Sigh...
Subscribe to:
Comments (Atom)


