If you're a purist, you may want to just skip to the next post. Here's the part that separates my Megatron clone from the others floating around the internet. All the other ones I've seen are painted, then have Decepticon stickers put on them. Given the value of original P38s, that's understandable, but I don't want people to think I'm a poser. So I'm going to engrave the logos into the slide, because it's my gun, and I can. I've never engraved on moderately hard steel before, so I wasn't sure if my engraver would last, but it held up just fine.
Tuesday, March 26, 2024
Sacrilege!
Weld, it's about time.
With the frame piece machined, it's time to weld it all together. Almost. As you can see, the angles of the two pieces didn't match and there was a lot of overlap. So I had to fixture and mill them to match.
To hold everything while I welded, I made myself a jig. It's a pretty basic jig that just locates on some pin holes. Because the exact alloy is unknown but similar to 4140, that's how I decided to weld it. Preheated it up to around 400°F and went for it, then slow cooled it back to room temp. All the impact from the slide and barrel are on the new front section, so weld strength isn't something I'm overly worried about. Plus, they made these frames out of aluminum too, and even soft 4140 is tougher than 7075 aluminum.
With the welding done, I could get all the parts fitted and functional. I haven't done any cosmetic finishing on the welds yet, just did what I needed to make it work. For what it's worth, my P38 parts kit was made in 1961, though I bought some of the early style grips for it, which are the correct style for Megatron.
Finishing with the danger glitter
If you're a regular follower of this blog, you'll know that dropping off the face of the internet is a thing that I sometimes do. Stuff comes up, stuff gets put on the back burner, stuff gets picked up again. Life was a serious struggle for a while there, but I'm back for now.
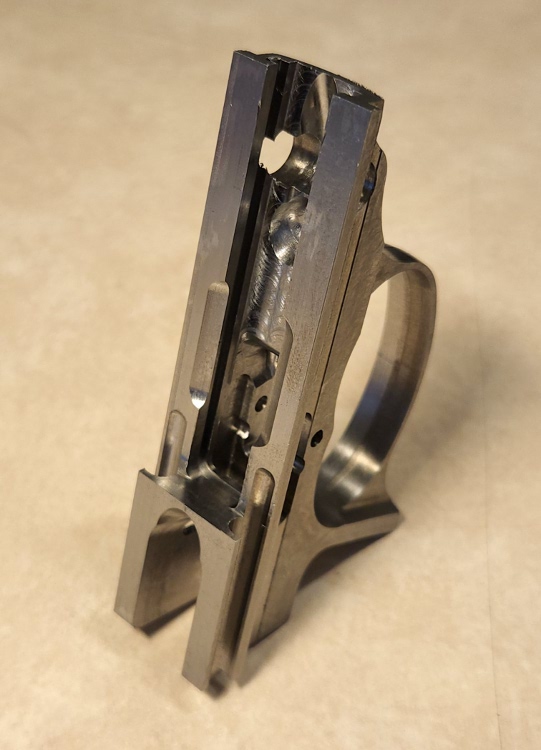
Time to finish up making the danger glitter on my Megatron P38 project. Have I mentioned how much I hate machining steel? There is nothing about it that I like. I miss my aluminum. But steel is what I got so steel is what I'll cut. Few pictures and fewer words because I didn't take may pics along the way. It took 3 more setups to get the machining finished on this frame chunk.
Friday, April 8, 2022
Danger Glitter
I have no idea what kind of steel P38s are made from, so machining and welding are going to be guesswork. I had the raw forging and the original frame piece XRF tested to see if I could narrow down the alloy used, and the results were fairly inconclusive. The manganese content was in the range of 4130, spark testing looked similar to the 4140 I compared it to and when I heated and quenched a chunk, it got hard-ish so it's got some carbon in it. For lack of better options, I decided to treat it like 4130 for machining and welding.
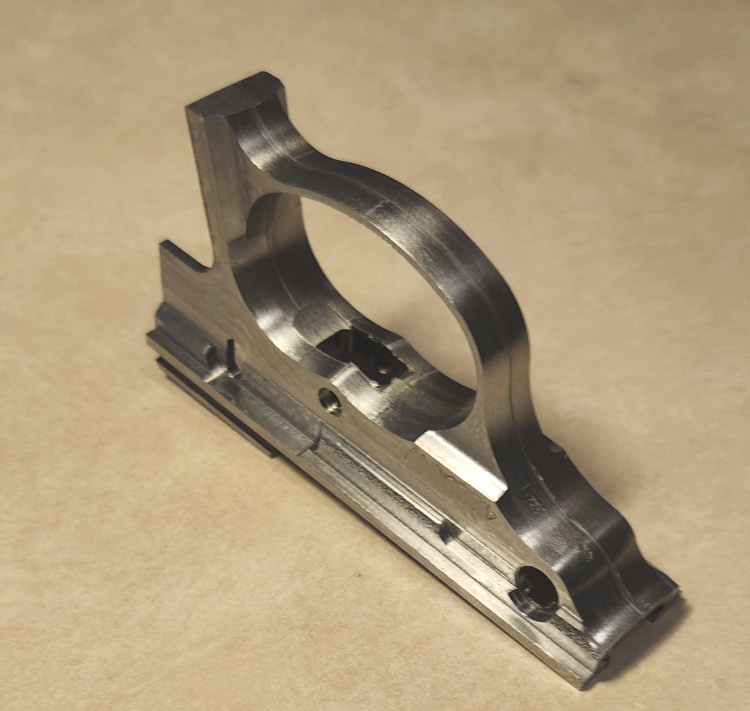
I hate machining steel. There is nothing I like about it. It's not very forgiving if you do a dumb, it's hard on tooling, and worst of all, unlike aluminum the danger glitter is more than happy to stab itself into your fingers like tiny little needles. Machining from a raw forging like this presents it's own challenge too because I know there is a lot of extra material there, but I don't know where. After whacking off the chunk of forging that I needed, I decked the top and cut the overall width so I would have some straight, square surfaces to work with. I decided to start my CNC work with the inside of the trigger guard because its the area with the least amount of extra material on it. I tried to centerfind the pocket with the proper tools....and promptly broke a cutter on the first pass because it was too far off. So I eyeballed it instead and didn't break the next one. Since the trigger guard is a weird shape, I also decided to drill the trigger pin hole to use as my program center so that I had an easy to find reference point.
Slow and steady is how my little mill mills, and with mildly hard steel it's even slower. My feed rate was pretty average for the material, but my depth of cuts were very shallow. A whole day of machining got me this far:
After a whole lot more painfully slow machining the first side was done.
New Project Time: the Megatron P38
If you've been following this blog long enough, you know that Transformers is one of my favorite things(the real Transformers, not the smashed Coke can looking Michael Bay stuff). I also like guns(which is why most of you are here at this point), so I decided to combine the two. While he's a plane or a tank or something now, the original G1 design for Megatron was a Walther P38.
I don't mind toys that look like guns, but I'm generally opposed to guns that look like toys(looking at you Lego and Nintendo Light Zapper themed Glocks). I'm making an exception here because the original Megatron design still looks very much like a real gun and is not brightly colored in a way that would attract a curious toddler(cough Lego themed Glock cough). Here's the look I'm going for, although I probably won't add the scope(pictures stolen from the internet).