Monday, October 6, 2014

Just a pic


As I've said before, I also use this space as a photo dump for posting pics on various forums.  Some guy on the Impala forum found a spring on the floor of his car and didn't know where it came from.  I happened to see it in my car so I took a pic.  That is all.


More random photos...


I has a box...


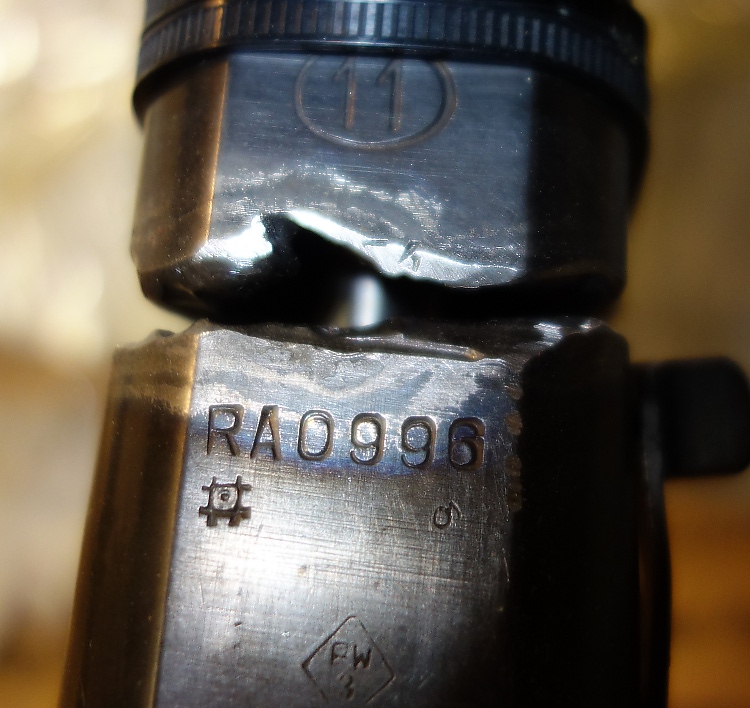
Another random pic for use elsewhere, this one is the dimensions of the Gen II Viper cam sensor.
Another random pic for use elsewhere, this one of some machined Delrin.

Woo! Random pictures!
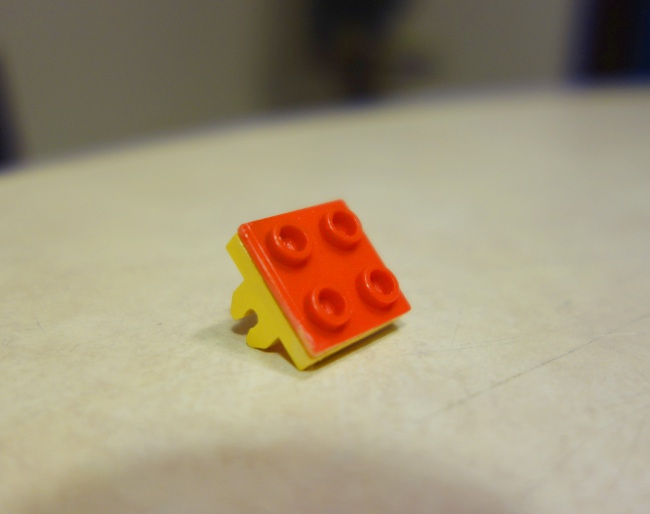
LEGO!


Saturday, October 4, 2014

The Winter Soldier

I have a thing for big rear wheel drive American cars.  Chevy B-bodies to be specific.  The second car I ever owned was a 1986 Caprice that got me through the second half of college.  It was replaced by the Mighty Caprice™, a '94 LT1 powered ex-cop car.  The Mighty Caprice™ has been my faithful steed and winter warrior for the past decade.  Only twice in that time has it left me stranded, and I've only been really stuck in the snow maybe half a dozen times.  But the Mighty Caprice™ is showing it's age.  It's rusted like crazy and it's at the point where it might start getting more expensive to fix than it's worth.  Plus the hassle of having to fix it in the cold if it does break down.  And the radiator exploded.  So I started thinking about what I might want to replace it.

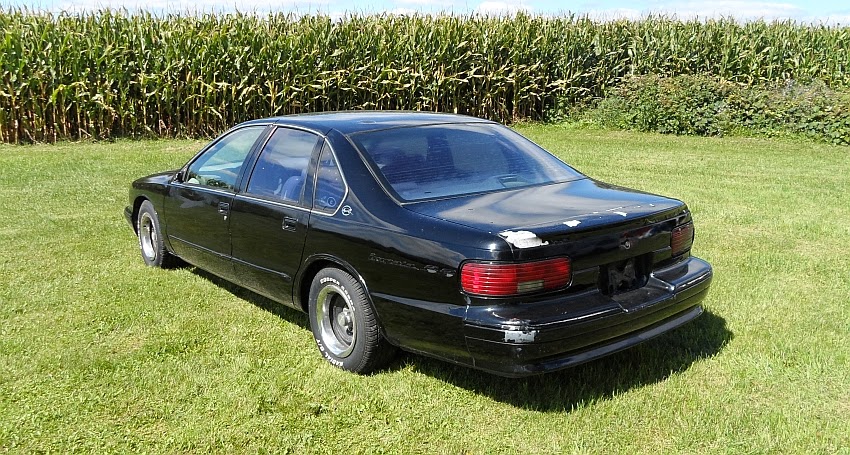
And then I found it.  You see, a major part of the reason I like these cars is because of my lust for the '94-'96 Impala SS.  My ultimate dream car: the Viper.  My "actually may be able to afford one someday" dream car: the Impala SS.  I've lusted after one since I first saw one in 1994.  I never bought one because they always cost too much, and are too nice to use as a utility vehicle and winter transportation like I do the Caprice.  Until now.  I was trolling Craigslist, just browsing cars to see what was out there, and I stumbled across a '95 SS.  It looked beat up in the pics, but it was cheap and the guy assured me that it was rust free and was a genuine SS.

So, I went to look at it.  I knew that if it was what he said it was, it was coming home with me.  And it did.  The sticker in the trunk has the magic WX3 code, so despite the wheels, it is a genuine Impala SS and not a clone.  It's not much to look at, but is mechanically sound and is as rust free as the guy said.  It was the "rust free" part that really sold me on it.  Until I can come up with a better name, and since it will be my cold weather car, I've dubbed it the Winter Soldier™


The guy I got it from had it for 10 years and I'm reasonably certain this was a theft recovery car at some point before that.  It's never been in a major accident, but the title had something to the effect of "transferred to insurance company, claim paid" on it.  The guy also said that the guy he got it from said that the stock wheels were stolen.  Plus, the headrests had TVs in them at one point, and there is wiring left over from a HUGE stereo system(with 0 gauge cable running to the trunk and 12ga speaker wires running all over the car to the now missing speakers).

I know the guy I got it from didn't take all the stereo stuff out.  While he seems to have kept up the car mechanically, he didn't seem to care at all about how it looked.  Even seemingly important things like the steering wheel were overlooked.  The upper hoop is broken off, only the leather cover is holding it together.  The guy said it was like that when he bought it, and the shininess and wear on the broken joints back that up.  The airbag, unpopped, was laying in the trunk.  I know SS steering wheels aren't the cheapest, but really?  The local salvage yard has a Caprice wheel in stock for $35.  And I know the guy wasn't completely inept, the day I stopped over, he was replacing the water pump on a Durango, a job that involves taking most of the front of the engine apart.  And quite frankly, he was a...uh...larger gentleman with poor personal habits(which sounds more PC than Fat Slob).  The interior of the thing was just filthy.  Seriously disgustingly gross.  I don't think it's EVER been cleaned.  I didn't even want to sit in it long enough to drive it home. 


As an added bonus, all the interior plastic panels are covered with one of those cheap ass woodgrain kits.  The woodgrain is super cheap and is falling apart, but the foam tape holding it on seems to be the absolute best foam tape 3M makes.  The stuff just does not come off...

Though some people might think it crazy to use a genuine SS as a winter car, this one will never be nice enough to cause me any concern. The car will be getting a full makeover, starting with the interior by scrubbing, then rescrubbing, and scrubbing again just so I feel comfortable even sitting in it. There are a lot of minor but important mechanical issues to take care of too.  I'm on a tight schedule, because it all has to be done before it starts snowing.   This should be fun...


Wednesday, October 1, 2014

Really floored

Once upon a time, I replaced the floor pans on the Beetle.  It was a big affair, Dad and I pulled the body off the pan.  At the time, it was also the only car I had, which means WI winters.  Seven years down the road, I stepped through the Drivers's floor.  Last time I had the Beetle out, I fixed that.  Not surprisingly, the passengers side is pretty rusty too, so I decided to fix it.  Instead of cutting grinding, welding, and cursing, I decided to use the Jeff Tanko Glasspatch(patent pending).  Ive used it with great success many times.  Basically, you just layer fiberglass over the swiss cheesed rusty metal.  It may seem like two-bit hackery, but it works, and works well.  The fiberglass resin bonds well to the rough rusty surface, and seals it off from moisture.  I used the Jeff Tanko Glasspatch(patent pending) on one of the inner fenders on the Mighty Caprice™  four winters ago, and it's still holding as good as the day I did it. 

The first step is to prep the metal.  A wire brush on an angle grinder works well.  Any clean metal gets ground so the fiberglass sticks. You can see in this pic the holes in the front floor section. 
Next comes the 'glass.  I put four layers over the whole floor, two cloth, two mat, and ending up with around 1/4" of fiberglass over the whole thing.  I also ran the glass up around the sides to bond the floor pan with the rest of the body.


Though rusty, the rear of the floor actually had most of it's metal still there, and I want to keep it from rusting more.  The inside is taken care of, the outside, not so much.  After a through wire brushing, this is what we're left with:
Remember how I said I love brushed on Rustolium?  Once again, I'm using it as my not so secret weapon.  To be really effective, it has to go on thick.  I used a roller, and used an entire quart to coat the floor.  Between the Jeff Tanko Glasspatch(patent pending) and the Rustolium, the floor in the Beetle should be good for many years to come :)


Sunday, September 21, 2014

The rest of the story

With the front suspension back together, I could get  the front end buttoned up.  With this kind of thing, where surface finish isn't an issue, I paint it with Rustolium.  I paint it on with a brush, so it goes on very thick.  It can take over a month to fully cure when it's that thick, but once it does, it's nearly as tough as powdercoating.  While I was at it, I replaced most of the brake system.  Most of the lines were replaced, along with hoses, wheel cylinders, and the master cylinder.  I also replumbed my line lock so that it locks both front wheels instead of just the front right(which makes for much better burnouts).  Part of the reason for replacing so much of the system is that I wanted to switch to DOT 5 brake fluid.  Unlike standard brake fluid, DOT 5 brake fluid doesn't absorb moisture.  That means the brake system won't rust from the inside out so I will never again have to replace the metal parts of the system.  It's a much better choice for an older car that doesn't get driven all that much.


Saturday, September 20, 2014

That doesn't look safe. That doesn't look safe at all.

I've had my VW for a very long time.  Hard to believe, but for a number of years it was my ONLY car.  Because of that, it got driven all year round, and soldiered on through many WI winters.  It is actually the best winter car I've ever had.  I NEVER got stuck with it, not once.  Even the Mighty Caprice™ gets stuck occasionally.  As a consequence of winter driving, it got pretty rusty(not to mention that it what already pretty rusty when I got it).  When I first put it in storage, the front suspension was "questionable."  I had previously roughly and sloppily welded some 1/4" plate steel under the frame head(the part of the floor pan that the whole front suspension bolts on to).  When I got it out this time, fixing the front suspension was at the very top of the priority list.  Driving it from the storage unit to my house, I was nervous that it might actually break.  Here's the area we're fixing.  It's easily accessable after the gas tank is removed.

The front axle is the large tube running across the bottom of the pic, the triangle piece is the frame head(the piece we'll be working on).  Since it's a unibody, the whole pan is made from stamped sheetmetal of varying thicknesses, including the frame head.  Doesn't look too bad, right?  Lets take a look at it from the bottom...

Now you understand my concern.
I didn't want to replace the whole frame head.  Because it's where the whole front suspension attaches, it's absolutely critical that it be aligned perfectly.  I didn't want to mess around with all that, so I decided to replace just the lower piece.  Conveniently, VWs are popular enough that almost everything is available as a reproduction.  I was going to make my own bottom plate, but it was actually cheaper to buy the actual correct part.  This particular part was stamped in Denmark too, and is a quality reproduction.  After cutting off what was left of the bottom plate, you can see just how little metal was actually holding up the front of the car.


Here's a view of what was left on the car with the really rusty bits removed.  Just that little bit of sheetmetal was holding up the whole front of the car.  

After grinding the rust back to good metal, I sprayed the areas to be welded with weld-thru primer.  Weld-thru primer is typically almost pure zinc.  It gets sprayed on before the metal is welded together.  It's meant to be welded over, giving you some rust protection between the panels, acting like galvanized metal.  After careful measuring, I welded the new panel into place, putting welds where ever I could.

From the bottom, it's easy to see where my welds are.  The new panel is about 1/8" thick, so I could crank the welder up and get full penitration on my welds.  As you can see, there wasn't all that much good metal left to weld to. 

There wasn't enough welded area along the bottom of the frame head for my comfort.  For the most part, the sides and top of the frame head, never having snow and water standing on them, were still perfectly good and thick metal.  To give the frame head more strength and help tie everything together, I made some more plates out of 1/8" steel.  Here are all the pieces I added, in the location they're placed on the car.
Finally we have everything welded together.  You can see I also added some vertical straps that go well up the firewall for added support.  Once again, everything is backed with weld-thru primer.  With all the reinforcement welded on, while not the prettiest, my front suspension is now stronger than it was when it was new.


Sunday, September 14, 2014

Project One

Many many years ago, I got my first car.  It was a little foreign car, and not very glamorous.  My little car needed paint.  So, my little foreign car got painted with some big American colors.  Since it's been in storage for so long, most of the people I currently associate with have never seen it.  Many don't even know I have it.  Now that it's out of storage, people who didn't know I had it started asking if I bought it because it matched the Viper.  They're always surprised to learn that it's the actually the Viper that matches the Beetle.  My Beetle's been painted like this since just a few months after the Viper was even built :)  As it happens though, they're both painted after the original Shelby Cobra.


Saturday, September 13, 2014

More CADventures

If you don't know, I work as a Tool and Die maker/CNC programmer.  I make the tools that go into the machines that form the parts.  A while back, I made some palm sized versions of the tooling we make for some co-workers to keep on their desks.  Talking to another coworker he said in jest "Make me a Millennium Falcon."  Haha, big funny, everybody laugh.  Then I got to wondering if I actually could.  So I took it as a challenge, partly to make a birthday present for my coworker, but mostly to see if I actually could.

To do any CNC machining, you first need to have a 3D model of the object you want to machine.  While there are many programs that you can use, Solidworks is the industry standard.  Through some very complicated magic, I ended up with a solid model of the Falcon that I could then program.  Here's the model as a work in progress:
With the solid model complete, I programmed and ran the model on the CNC mill.  I cut it out of a synthetic wood material called Renshape, the material we use at work for sample molds.  It cuts almost as easily as air, so it can be machined at incredible speeds and is very easy on the tooling.  I don't have any pictures of the machining in progress, so you'll have to use your imaginations.  More magic was involved.  Here's what I ended up with.  The quarter in the pic is for size reference.


There are some things about it I'm not happy with, but overall it turned out pretty good.  It certainly looks neat sitting on my coworker's desk :)