Monday, December 29, 2014

An arm resting development

One of the common problems with B-bodys like the Impala is that the arm rests aren't as strong as they could be.  After 20 years of using them to shut the doors, the plastic is often cracked and they don't stay in place.  The arm rests on the Impala were particularly bad(and, ironically, in perfect condition on the Mighty Caprice™).  The plastic base was very cracked, the screw holes broken out, the vinyl cover torn, and on the Driver's side, someone had drilled new holes through it in an attempt to keep it in place(also, both were so discolored that they got a coat of SEM to get them looking nice again).  Eventually, this can lead to a cracked door panel too, as it sees some of the pulling forces.


On my passenger's side, the whole broken area was cut out so only the vinyl cover was holding the armrest on.  You can see too that someone at some point used a whole bunch on really short screws to try to hold the cover back on.  It actually works well enough that I'll leave those alone.


A permanent fix for this is so simple I can't believe I've never seen it discussed before.   I just bent up a piece of 16ga sheetmetal and screwed it down.  The armrest hold down screws go through the sheetmetal so that when you pull on the arm rest, all the load gets transferred through the metal piece into the door.  I also taped the sheetmetal to the armrest with 3M double stick foam tape, making the sheetmetal and plastic arm rest essentially one piece.  In order for this to fail, the whole armrest would need to be cracked in half.

We still need to do something about the top side though.  I wanted the arm rests clamped down tight so they wouldn't move at all, and wouldn't stress the door panel any.  Plus, there were tears and extra holes my vinyl.  So, I got some 1"x1/8" aluminum and started hacking away.  While I was at it, I upgraded from the original sheetmetal type hold down screws to countersunk stainless 1/4-20s, 1" long.  The J-nuts on the door were changed to match.  The thickness of the aluminum plate allows for a nice countersink.
With everything in place and tightened down, the arm rests are rock solid.  The arm rest and door panel are sandwiched between the door and the aluminum plate, and everything is solid enough that you can really crank it tight.   Never again will I have to worry about someone using the arm rest instead of the door pull to close the door and never again will an arm rest come off in my hand.


Wednesday, December 24, 2014

I'm feeling blue

This Impala is a strange beast.  In many ways it is leaps and bounds better than the Caprice.  And yet, in many ways, it's in much worse condition.  Take the dash board for example.  The Caprice spent much of it's life with me sitting outside in the sun.  From what I can tell, the Impala similarly spent most of it's time outside.  Yet, the Caprice dash top only has a few minor splits in the vinyl, while the Impala dash is cracked beyond repair.  So, I decided to swap the two.
Obviously, there's a bit of a color difference there.  It's OK, we can fix that.  SEM Color Coat paint is specifically made for fabric and vinyl.  I've been using it for years and it works fantastic.  It's flexible too so it won't crack or peel off soft materials.  Conveniently, their 15393 Medium Gray is an exact match for the Impala's gray.  I used around two cans to get a few good coats on the dash top.
Initially, I was just going to swap dash tops.  But, you have to take the whole dash apart to get the top off anyway, and since I planned on selling the Caprice, I thought it would look silly with a gray dash top and blue everything else.  The rest of the Caprice dash bits were in better shape than the Impala dash too, and swapping them kept me from having to peel more of that awful fake woodgrain.  So, I painted all the other Caprice dash parts while I was at it.
The Impala's steering wheel was broken when I got it.  The guy said it was like that when he got it.  Just the leather wrapping was holding the hoop on.  It was also mounted upside down, and the (unpopped) airbag was laying in the trunk.

My friend nearly drove the car into a ditch while turning because he tried to grab at the wheel and there was nothing there.  How a guy drives a car that way for 10 years, I can't imagine.  Particularly when replacement wheels are so cheap, the local salvage yard wanted $35 for a Caprice wheel.  The Impala wheel is the same as a Caprice, just leather wrapped.  The lack of leather wrapping doesn't matter to me at all.  The steering wheel wasn't the only issue though.  The shift lever mounting boss on the column was broken too, so the shift lever wasn't actually attached to anything.  It just kind of flopped around, and in anything lower than N, it would fall out when you hit a bump in the road.  Conveniently, the yard with the $35 wheel had the whole column with wheel and airbag for $100.  I was going to swap the column out of the Caprice along with the dash, but for $100, it wasn't worth the effort to change the lock cylinders in two columns and have to R&R the column in two cars.  Like my Caprice, this column was blue too, so it got a good SEMing.  The blue wheel and airbag were scrubbed and SEM'd separately.

Since I had the SEM out already, one of my rear door panels had a stain that wouldn't come out.  The plastic it's self was actually discolored.
SEM to the rescue again. 
I can't say enough good things about SEM.  I love the stuff, and it did a good job chasing my blues away :) 


Wednesday, December 17, 2014

The enemy that never sleeps

We car enthusiasts here in the Midwest have one enemy that stands above them all...Rust. One of the things that sold me on the Impala is that despite it's looks and general lack of cleanliness, it was nearly rust free. Since this is going to be primarily a winter car, and I plan on having it a very long time, keeping the rust at bay is one of my primary concerns. Like many things of this sort, the internet can't agree on the best way to go about it. I chose to use a couple of different products based on personal experience. The first is Eastwood's Rust Encapsulator. It's a rust killing paint, but unlike POR15, it doesn't contain isocyanates so the fumes are much less harmful. You'll still want proper safety attire though. I used it on the Caprice many, many years ago, and it held up fairly will. It took around three quarts to cover the bottom of the Impala. Everything gets sprayed, paying attention to nooks and crannies. With that done and dry, the whole underside of the car gets sprayed with Amsoil HD Metal Protector. The HDMP dries into a self-healing waxy film. Because it doesn't stay wet, it doesn't collect dust and road grime. I used almost a full case, 10 cans, on the underside of the car. A can goes a long way, and a lot of it was sprayed into seams and joints, and other places where slush might build up and water might pool. It dries to a translucent brown, but over the black paint you can't see it.

I have one more trick in my rust prevention bag.  We've got the outside of the car covered,but there are many places where the car will rust from the inside out.  Of particular concern are the lower corners of the rear wheel wells.  They collect dirt, which holds moisture, and they just rust away.  My product of choice here is WK's Seal-Out
At $90/gallon it's not cheap, and can be hard to get a hold of, but it works well. It's an awful looking oily greasy goo. Unlike the HDMP, it doesn't harden, it stays semi-fluid. Because of this, it will seep into seams and crevasses, and will continue to do so for months to come. Spraying it in with an undercoating gun and a hose is ideal, but I don't have a sprayer so a brush will do. I glopped in as much as I reasonably could, making sure to get it smooshed all the was into the corner. Each inner wheel well got about 12oz. I also put some inside the doors, and inside the vents in the rear door jambs. It's not very appealing stuff, and you only want to put it in places that will never see the light of day.
So, just how well does this creepy stuff creep?  Darn good.  Here's one of the wheel wells a week later.  All the dampness you see is from the Seal-Out seeping from inside through the seam in the sheetmetal, and it goes all the way around the wheel arch.
It took ten years of winters for the Caprice to get as rusty as it is, I'm hoping to get double that out of the Impala.

Tuesday, December 16, 2014

Some little things

There are a ton of little things that needed to be done on the Impala.  Here are a few of them.
If you noticed in my original pics, the right tail light lens is crunched.  I asked the guy about it, he said that it happened when he first got the car.  He parked it, and it rolled into a truck in the parking lot.  I thought it was odd, but no biggie.  Then I parked on a slight incline.  Or at least tried to anyway.  Up to that point, I'd always parked on flat surfaces.  Turns out it never really locked into park, but the shifter moved far enough to get it out of reverse.  The shifter always had kind of a wandery feel too, it didn't solidly click into the gears.  So, under the car I went, and this is what I discovered:
Yeah...the shift linkage was loose and flopping around on the transmission side.  There's supposed to be a washer and cotter pin on that.  Ten years this guy had this car, and drove it around like this.  It's a two minute fix.  It literally took longer to jack up the car and put it on jack stands than it did to fix.  Properly installed, it clicks into the gears, and actually locks into park.


Next up, the brakes. 
They were kind of grindy sounding.  Took the fronts off, and found new rotors and new pads.  Took the rears off and found this:
Yup, down to the metal backing. The new pad on the right shows what they're supposed to look like.  While I was at it, I un-siezed and relubed the rear slide pins.  More ineptitude from the guy...

The last bit, surprisingly, has nothing to do with the guy, but B-bodies in general.  There is a plastic tee in the heater hoses that has a habit of getting old an cracking.  I know mine was original so it was only a matter of time.  I was swapping the silicone hoses from the Caprice anyway, so I replaced the tee too.  The hose sizes are 3/4x3/4x5/8.  I tried piecing together a metal tee with hose barbs, but couldn't find the right fittings at any of my local hardware stores.   Then I stumbled across something.  Unlike hose fittings, Pex tubing is measured by OD, not ID.  It turns out that a 1x1x3/4 Pex tee is the perfect size for our heater hoses.  It's shorter than the stock tee, but there is enough extra length in the hoses to make it work, and I'll never have to worry about it breaking again.


Saturday, December 13, 2014

The Mighty Caprice™

I've mentioned the Might Caprice™ in several posts, but I've never shown it.  Since it's for sale, there's no time like the present.  Here's the text of the Craigslist ad I posted:

Do you love the roar of an American V8? Do you need a car to drive this winter? Is your new favorite movie Lets Be Cops? Then the Mighty Caprice is the car for you. It's a 1994 Chevrolet Caprice 9C1 police package. This thing is built like a tank, and is the ultimate winter car. It's packed with too many features to list, but I'm going to try.

It's got an LT1, 350 cubic inches of fire breathing smallblock fury. Runs great, though the pistons slap a lot until it warms up(it's a 90's GM, so that's to be expected). I've always used Mobil 1 oil in it, and can provide the most recent used oil analysis showing the engine's condition.
Transmission was rebuilt around 60K ago, and has a 2500rpm stall converter for great off the line acceleration.
Water pump, distributor, and fuel pump were replaced at some point.
Factory posi works good in the snow, not so much on dry roads.
Brand new radiator. Seriously, this radiator doesn't have 50 miles on it. Old broken radiator included at no extra charge(A $10 value at the scrap yard).
According to the Compnine vin decoder, this car is 1 of 32 identically optioned cars built(Take that Mopar boys!). The combination of dual spotlights and side molding delete is very rare making this car a true collectable.
Speaking of the dual spots, they both work. Great for shining deer, or spying on the neighbors.
It's got cop springs, cop shocks, and cop sway bars. They make this 4400Lb boat handle like it's only 4300Lbs.
4 wheel disc brakes, only available on Cop cars and Impala SS's. ABS doesn't work, but that's OK because the brake calipers are painted red and have Corvette stickers on them(just stickers, they're not actually from a Corvette). Front rotors replaced last summer, rear rotors replaced a few years ago.
AC doesn't work, but who needs AC when 3 of the 4 windows roll down.
Power locks work, but you'll never need them because no one is going to steal your factory AM/FM radio. Included at no extra charge is the finest $60 radio Wal-mart had to offer in 2008(with proper wiring adapter).
Trunk lid spoiler is made from a genuine Nascar hood section, which adds like 200 HP. It's also good for an extra ½ mpg. Also included is the original, undrilled trunk lid if you decide the spoiler is just too awesome.
Tires are Bridgestone Blizzaks, literally the best snow tires money can buy. They even have some tread left on them. Comes with two spare wheels with very questionable tires.
Don't trust your friends? No problem, this thing has anti-stab seats(cop seats have steel plates in them to prevent stabbing through them).
It floats down the road, feels like you're going 100 MPH when you're standing still. Though you could actually be going 100. Hard to say because the speedometer only works sometimes.
Body is covered in carefully placed "speed dimples" for more performance, just like a golf ball. Most people mistake them for regular dents.
Body has many lightening holes to reduce weight, disguised as ordinary rust.
Much of the rust has been spray painted over. No one will ever know it's there unless they direct their eyes in the general direction of the car.
It's got Thrush Welded mufflers for that awful Flowmaster sound without the awful Flowmaster price.
Airbox has a K&N sticker on it, though no K&N filter is included. It's just a sticker, but I read on the internet that stickers add like 50 HP.
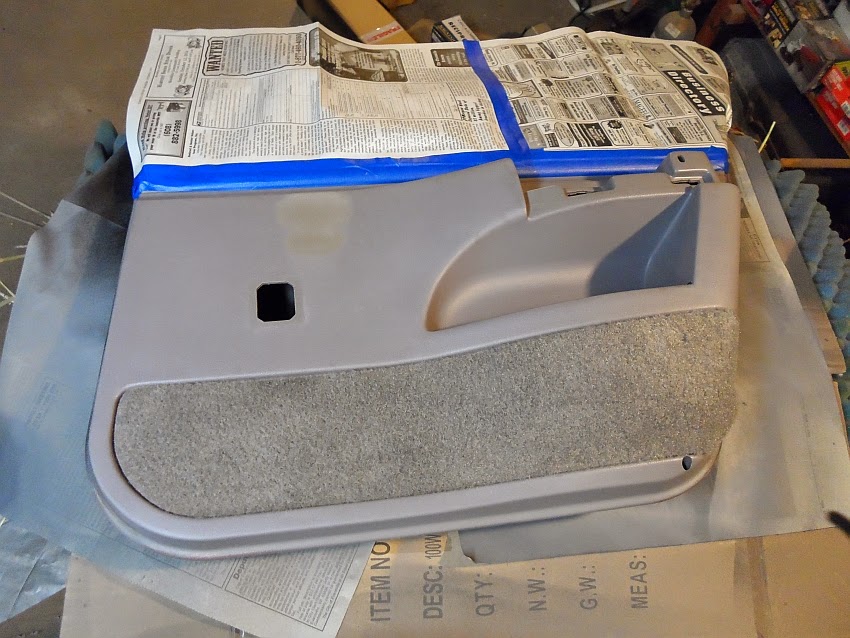
Dashboard is from an Impala SS, because chicks dig Impalas.
Comes with a full tank of gas, a $60 value.

I'm asking $800, and I'm firm on price. It's probably worth more than that because of the LT1, but I don't want to haggle. In all seriousness, though it's banged up and rusty, it's actually a decent car. You won't find a better car for the price, and you won't find a cheaper V8 anywhere. It's been very reliable for me and was my primary driver until the original radiator failed. Fun to drive in the snow, and I've never been so stuck I couldn't get myself out. For an extra $300, I'll throw in a set of nearly new Cooper Cobra tires on rims. It needs nothing and runs and drives as is, though it cranks slow so if I were going to keep it I'd probably replace the battery or the starter. I work odd hours, so I prefer e-mails, followed by texts, and phone calls last. Thanks, Jeff.


There you have it ladies and gentlemen, the Mighty Caprice™ in all it's glory.  It's banged up, and rusty, and has been my faithful steed for the past decade.

Monday, December 8, 2014

Well that's dome.

The Impala didn't come with a dome light, it had gone missing some time in the past 19 years.  The Caprice did have one, so I thought I would swipe it for the SS.  Much to my chagrin, the Caprice and SS dome lights are different, so the the dome light couldn't be mounted.  The problem is the two round holes seen here.  The Caprice dome light screws just thread into the sheetmetal, but the SS has holes stamped out there.
The solution is a super simple one.  I just bent up some sheetmetal to hook over the top of the roof crossbar.
With that there, the Caprice dome screwed right on.
With that taken care of, I could put the headliner back in.  Once it was up, I carefully cut all the holes for the dome light, coat hooks, etc.  Eventually, I might recover the visors in matching suede, but it's good enough for now.


Saturday, December 6, 2014

Head(liner) of the class(iest type)

One of the reasons for stripping the entire interior out of the Impala was the headliner.  Not only can headliners hold smells, this one was also stained and was about to start sagging.  To get the headliner out, you need to take off all the plastic trim panels.  It will actually come out of the car with the seats in if you don't want to strip the whole car down.  The trick is to put the passenger seat all the way back and all the way reclined, then the drivers front corner of the headliner goes out the lower front corner of the passenger door.  It's like those bar puzzles with the two nails.  It seems impossible, but once you get it just right it slides right out.

Washing the headliner to eliminate any odors is the next trick.  I lay it on the driveway cloth side up, hose it down, and scrub it, rinse, and repeat.  The tricky part is drying it.  The main headliner is pressed fiberglass.  It's not very strong, and when water logged is VERY heavy.  The fastest way to get it dry is to stand it on end and let the water drain.  It will hold it's shape if you're, but it must be balanced just right otherwise it will fold and crease.  It will also want to fold crease as you lift it.  A creased headliner isn't the end of the world, but can look bad.  It's really a two person job to get it standing upright.

Originally, I had just intended to wash my headliner, but the stains didn't come all the way out, and the material was very worn over the driver's door.  I also tore the backing while trying to lift it while it was wet.  So, I decided a full recover was in order.  First things first, I had to fix the backing.  You can see here the piece I accidentally tore out, a section over one of the rear doors.  You'll notice that I'm wearing gloves too. I HIGHLY recommend it because the fiberglass will get very itchy on your bare hands.


Since these things are pressed fiberglass, fixing them is really easy.  Just mix up some fiberglass resin, and soak it in.  Since the broken edges are fuzzy and it's just a headliner, no additional reinforcement is necessary.
While I was at it, I soaked resin into all the other creases and tears in the fiberglass.  Here are all the spots I ended up fixing.  Note that I did this before removing the original cloth.  In some places, the cloth was all that was holding the fiberglass in place.
Once that set, it was time to take the original cloth off.  You've got to be careful with it, the fiberglass is pressed in layers and the layers can start to peel off with the cloth.  Any of the original foam backing that was left got attacked with a wire brush.  Here it is all stripped and prepped.
To add some classiness, I decided to go with a suede material.  It doesn't hurt that the material is only $15/yd either.  You need two yards to cover a B-body headliner.  I got mine from http://www.yourautotrim.com/suhefba.html Their foam backed Grey is a very close match to the stock Impala color, and it was right around $50 shipped for the material.  Gluing the material down is the most critical part.  If you don't do it right, it will quickly start to sag.  if you have access to professional grade contact cement and a spray gun, so much the better.  I don't anymore, so the next best thing is 3M's Hi-Strength 90.  I used about 2 cans of it.  It's very important to follow the direction on the can to the letter.  Instead of doing it all in one shot, I glued the material down in halves, first the back half, then the front.  You want to avoid stretching the material if you can.  If there's tension on it, it is more likely to pull away from the backing.  Since it's a contact adhesive, you can't peel it up and reposition it, you only get one shot.  Here's the back half waiting for the glue to tack up:
With the face glued, I let it sit a few days to get good and cured.  Then it was onto the back.  The material gets wrapped around a section at a time.  You'll need to cut slits in it where it wants to stretch, just make sure they don't get cut so far that you can see them from the outside when it's installed.
Here it is, all covered up.  I got some wrinkles in the front corners, but nothing I can't live with.  If I had been a bit more careful, they wouldn't have been there.  The holes for the dome light, coat hooks, etc will be cut out as it's being installed, just to make sure everything is in just the right place.


Sunday, November 30, 2014

How to clean the ever living @#$% out of your seats

Away from the greasy, gooey, gunky mechanical part of the car and back to the real dirty stuff.  You remember how dirty my seats were, right?

Here's my method of undoing all that nastiness.  I've used a lot of products on a lot of interiors over the years, and this is what works best for me. It works well on leather and vinyl, though you'd want to be careful is dealing with really old and dry interiors.  First thing, hose the whole thing down with Simple Green.

Scrub it up, wipe dry, and repeat as necessary.  Here's how it looks after three rounds of scrubbing:
Better, but it's still pretty dirty.  The problem is the texture of the material.  While the surface is clean, the grain of the material is still full of dirt.  The best way to get this out is with a toothbrush.  Seriously.  I toothbrushed the entire seat.  Also, don't use your real toothbrush, use an old one.
A Mr. Clean Magic Eraser works wonders too.  Here we are after many scrubbings and Magic Erasings:
Normally, this is good enough.  Not this car though.  I don't know what the guy was carrying in his back seat, but it was something.  It was almost like tar, but wasn't.  It left stains that required more persuasion.
The first solvent I always try is mineral spirits.  It's very mild and shouldn't do any harm to the material.  I've tested it on hundreds of leathers and vinyls, and I've never had it cause any damage.  As always, test in an inconspicuous spot first just in case. 

Mineral spirits got most of it off, but not all.  So, I started working my way up the solvent chain to harsher solvents.  You have to be extremely careful doing this, if you're not careful, this WILL RUIN YOUR SEATS.  These stains were incredibly stubborn and I ended up using just about the harshest solvent out there, MEK.  MEK WILL melt vinyl, and WILL strip the color off the leather.  You must be quick with it, it can't sit on the material for any length of time, just quick wipes.  It's VERY easy to mess up and ruin your seat.  The MEK did the trick and lifted the stain out(or at least 95% of it, you can just barely see it if you know where to look).
Congratulations, you've successfully cleaned your seats.  You've also removed up any built up Armor-All or other "protectants" people have applied over the years.  You've also stripped some of the leather's natural oils.  We need to put all that back.  The internet rages over what products work best.  My preference is Lexol for the leather, and Mother's VLR for the vinyl.  The VLR is nice because it doesn't dry shiny.  It gives you a nice satin look, not the plastic look Armor-All and similar silicone based products leave.  Since the Impala's leather is perforated, I put on way too much Lexol, then rub it in down through the holes.  This way, it helps condition the leather from both sides.  When your done, you'll have a nice, clean, well cared for seat.


Monday, November 3, 2014

I'm feeling super lazy, which is like regular lazy, but I'm also wearing a cape.

Preventative maintenance time.  At 164K miles, I question the life left in the Impala's fuel pump.  I had one go bad in the Caprice with far fewer miles.  The guy also said that the gas gauge reads 1/4 full when it's actually empty.  Substandard fuel pump wiring and sending units that go out of whack are both common problems on these cars, so I decided to take car of them both.  I didn't want to reinvent the wheel, or cover territory that someone else has already done.  So, for this post, I'm not going to go into too much detail.  Suffice to say, I did THIS and THIS.  I used an Airtex pump harness with a new Delco fuel pump, they're pretty cheap on e-bay.  If you read the second link, you know about the fuel sender wiper getting dirty.  Here's mine.  Gee, can't imagine why it might not read accurately...
I also discovered another minor problem.  The fuel return line had come unsoldered from the cap.  Judging by the rust and buildup on the top of the sender, it has been like this a while.  That would explain the faint fuel smell when driving around on a full tank.

I clipped the line back into the clip, and resealed the connection with Seal-All.  It may seem hokey, but trust me, it works.  Seal-All is fuel resistant and sticks to about everything.  I've used it to repair actively leaking radiators, and even a roadside repair on an actively dripping fuel line that rusted through.  The stuff is simply amazing.

While I had the tank out, I took the opportunity to do some rust prevention too.  All the metal under the tank was painted with Eastwood's Rust Encapsulator, then sprayed with Amsoil's HD Metal Protector.  The first seals and kills any existing rust, the second leaves a self healing water repelling waxy coating on the surface.  All the seams, nooks, and crannies get a liberal coating of it, as well as an overall coat of the whole area.  The metal parts of the fuel pump module got a coating of HDMP too.