
Tuesday, November 5, 2013
Viper Tach
Thursday, October 31, 2013
The Beetle
Just a quick pic today. Here's a digital pic of a hard copy pic of my '69 Beetle. This was the day I got it, waaaay back in 1997. This is also the first time ever that my Beetle's been seen on the internet in it's original pre-painted condition.


Wednesday, October 23, 2013
Scraping
I'm used to driving very low cars, heck for many years, my '55 Plymouth had just 3/4" between the skid plate and the ground. Because of that, I'm used to watching where I drive and occasionally scraping the road. Sometimes though, I get myself into an unavoidable scraping situation. When I got the Viper, I noticed that the bottom of the bumper was very scraped up from it's previous owners. The air dam section I can live with(and I have to fix it anyway), but a large section of the chin is very scuffed and I'd rather not wear a hole in it.
There is a company that makes a bolt on chin guard, but it stands out too much for my liking, and if you really smack something, you'll bend the "fingers" and then it looks really bad. I decided to make my own. I used 1/8" x 1" aluminum with some 3M trim and emblem tape. The bars are curved to match the bumper, and the paint rubs told me where to put them. You can just barely see the tips sticking out when the car is on the ground, not enough that most people ever notice. I've had them on for a month or so and they've taken a few minor scrapes alright. My thinking is that if they ever do fall off or get scraped off, I'm only out a few bucks vs. the protection they offer for every day driving.

There is a company that makes a bolt on chin guard, but it stands out too much for my liking, and if you really smack something, you'll bend the "fingers" and then it looks really bad. I decided to make my own. I used 1/8" x 1" aluminum with some 3M trim and emblem tape. The bars are curved to match the bumper, and the paint rubs told me where to put them. You can just barely see the tips sticking out when the car is on the ground, not enough that most people ever notice. I've had them on for a month or so and they've taken a few minor scrapes alright. My thinking is that if they ever do fall off or get scraped off, I'm only out a few bucks vs. the protection they offer for every day driving.

Wednesday, October 16, 2013
Wheels
The first of the 5 spoke Viper wheels were cast instead of forged. Because of this, they have a tendency to crack. It's primarily the '96 cars that were affected. The easy way to tell is that the cast wheels have a weld going around the inside of the center, where the center is welded to the hoop. My wheels are different though. They have no weld, indicating that they're the later forged wheels, but they have a '96 build date. Hmm...


Tuesday, October 15, 2013
Robot!
Here's a robot I built not to long ago. He's a Graymark Scrambler, a
copy of a kit Dad and I built nearly 20 years ago. I made all the
plastic frame bits myself because I didn't like the color of the
included pieces. He doesn't work right though. The was it is supposed
to work is that he walks until he senses an object, then turns. The
sensor is optical, and doesn't seem to have enough range/sensitivity, so
he doesn't turn far enough and ends up angling into the wall and
getting stuck. He was still fun to build though.

Monday, October 14, 2013
Maintainance
The Viper's idle quality had been becoming increasingly erratic over the past few months. The problem is that the IAC gets carboned up and sticky. It wasn't enough to really trouble me, so I let it slide for awhile. Lately though, it'd gotten bad enough that it would sometimes stall when coming up to a stop sign. It's reasonably common on higher mileage cars, and at 46K miles, mine was due for a cleaning and I decided I should probably just fix it. The IAC is on the passenger's side of the intake, and is held on with just two bolts, with a big hose running to the air box. Since Acetone is the primary ingredient in many carb and throttle body cleaners, that's what I used, along with a tooth brush and some q-tips to clean all the way around the valve. Then I sprayed the whole thing off with TB cleaner.

 I noticed an immediate difference in the way the car runs after cleaning. It starts quicker, and the idle is much more consistent. If I'd known it would make so much difference, I'd have done it much sooner.

While I was at it, I decided to clean the throttle bodies too for good measure. They get a ring of gunk around where the throttle blades seal, and can sometimes cause some issues. Same thing here, Acetone and a tooth brush, followed by TB cleaner.

Monday, October 7, 2013
Exhausted
I finally got my axle back exhaust done. I'm used to welding aluminum, and I'm a bit out of practice on Stainless. These are some of the sloppiest tig welds I've done in a long time. Honestly, I'm not real happy with how it turned out. It will work, but I know I could have done better. I used Scotch-Brite to give the pipes a nice finish. All told, I've only got around $150 in it.


 It sounds pretty good. It's loud without being obnoxious, and it's got much more bass rumble than the Corsas I've heard. It's got a lot of drone at certain RPMs, but it doesn't really bother me, it's a sports car after all. It's not the thump of a V8, nor the whine of a V12, but it's own unique sound. For what it cost, I'm very happy with the sound. Here it is, no cats, no rear muffler, just the stock side sill resonators.


Tuesday, October 1, 2013
Tiresome...er...more exhausting
Time for more work on the Viper's exhaust. The first order of business after removing the stock muffler was to locate the tips exactly where I wanted them. Using plywood shims and duct tape, I hung the tips in the bumper cut out at the right angle and with the stick out I wanted.
 Then, I stared making the pipes, tediously cutting and fitting a bend at a time, working my way forward toward the stock pipes. I forgot to take pics along the way, but there's not much to it. Since I'm using 304 stainless tubing, the plan was to tig weld the whole thing together. I don't have a tig welder at home, so I bought a small spool of stainless wire for my mig to tack everything together. When I finish weld it, the stainless tacks will melt in with the rest of the filler.

Since the stock exhaust is 2 1/4", and I'm using 2 1/2" tubing, I needed some adapters. Stainless adapters are really expensive, so I made my own by flaring a bell shape on the end of some 2 1/4" pipe. I'm using band clamps at the joint between stock pipe and the new stuff. As it turns out, a 180° and a 45° provide the exact right amount of bend that you need to get from here to there. Here it is all tacked together. The hangers still need trimming, but it's pretty much ready to weld.


Since the stock exhaust is 2 1/4", and I'm using 2 1/2" tubing, I needed some adapters. Stainless adapters are really expensive, so I made my own by flaring a bell shape on the end of some 2 1/4" pipe. I'm using band clamps at the joint between stock pipe and the new stuff. As it turns out, a 180° and a 45° provide the exact right amount of bend that you need to get from here to there. Here it is all tacked together. The hangers still need trimming, but it's pretty much ready to weld.

Wednesday, September 25, 2013
Exhausting experience
My other main complaint about the Viper is that it was too quiet. The
stock exhaust, even without cats, sounded pretty wimpy and was way too
quiet. A couple of times, I almost forgot to shift out of 3rd on the
highway because it was so quiet. I also didn't like the look of the
stock exhaust tips. One of the first things I did was remove the stock
rear muffler. Viper catbacks are all pretty expensive, way more than I
want to spend. There are a couple muffler delete pipes on the market
too, but even they come in at around $500. I decided I'd just make my
own. I chose 304 stainless so it'll look good for years to come.
Here's what I started with. 8' of 2.5" tube, 1' 2.25 tube, one 180°-45°
bend pipe, some stainless rod, 2.25" band clamps, and a pair of Yonaka
3.5" polished tips. I can tell already that this is going to be an
exhausting experience...


Saturday, September 21, 2013
Clutch link
One of my few genuine complaints about the Viper is the clutch throw. You've got to step the pedal down a long way. I'm 5'10", and when I adjusted the seat and pedals to where the gas, brake, and steering wheel were most comfortable, I had to fully extend my leg to get the clutch all the way down. The pedal is connected to the clutch master with a linkage. Installing a shorter link is supposed to shorten the clutch throw. There is a commercially available one, but I just made my own. My new link is 5 5/8" x 3/4" x 1/4", with 1/2" holes on 4 3/4" centers. Both the original and new link are aluminum. Here's the new shorter link next to the original:
 Even with the new link, I still think that the clutch pedal travels too far. Fortunately, the Gen II GTS has fully adjustable pedals. All three pedal adjuster cables are tied into one knob under the dash. By removing the adjustment cables from the central hub, you can individually adjust the pedals. I moved the clutch up in relation to the other pedals so I don't have to extend my leg as far. While I was at it, I moved the gas pedal up a bit too so heel-toe shifting is easier. I also greased all the plastic bushings with some silicone grease to get rid of a squeak in the mechanism.


Friday, September 20, 2013
Gyro
After my last crash with the Drift Star, I decided that I needed a gyro to help me keep the car straight. Here you can see the difference with the gyro off and on. I'm using an Esky EK2-0704B gyro with the gain hooked into ch3 on my receiver. If the car starts to slide, the gyro will steer it back straight much quicker and more accurately than I ever could. I haven't driven it yet, so the settings are still pretty rough, over steering it slightly. I'll be able to get it dialed in better once it's on the road.
New wing
I decided for my new wing, I'd use the simple pro mod style. It should be plenty effective, and is super easy to make so if/when I crash again, I can whip up another one quickly.


Sunday, September 15, 2013
Fixing, part 1
It's cold and rainy out, a perfect day to work on the Fast and Cheap. When I crashed, the rear body mounts cracked out, and the rear body section cracked. Unlike Lexan, Shoe Goo doesn't really stick to PETG so the Shoe Goo/Drywall tape method of repair is out. Instead, I elected to just skin the inside of the tail with another sheet of PETG. This should provide reinforcement, and help stiffen the rear of the body too.


Monday, September 9, 2013
Packed in like sardines
In order to increase my chances of success with the Fast and Cheap, I added some more stuff to my already cramped chassis. The first thing I did was switch from the RTR radio to my FS-GT3b transmitter. It's got a dual rate function that actually works, so I'll have much better control over the steering. The second piece, which I should have left on from the get go is a gyro. I'm using an Esky 0704B gyro. This will help correct any slides as soon as they start, much faster than I can react. To get it to initialize, the yellow gain lead gets plugged into ch3 of the receiver. The third item, and just as important, is a handheld GPS unit. It's got an on board speedometer and top speed recorder. This means no more marking distance lines on the road, and no need to set up my radar gun. With less setup involved, I can just take the car out and run it with less worry about traffic and making a perfect run. All of this I managed to (just barely) squeeze onto the chassis and still fit under the low body.


Sunday, September 8, 2013
Battle scars
I finally have the motivation to do some work on the Fast and Cheap. I haven't touched it since it's first(and last) outing and subsequent crash. It was the back of the car that took the brunt of the damage. The wing broke, the diffuser cracked, and the body cracked. While not polycarbonate tough, the PETG I'm using did surprisingly well considering the tumbles it took.


The stock CD player in my '97 GTS didn't work when I got it. Here's what it did:
Any time I turn the ignition on, the player tries to eject a disc, even
if no disc is present. When I try to insert a disc, it will not suck
the disc in, doesn't matter if the radio is on or off. If I push a disc
in, it won't play, but still ejects ok. Any time it ejects, the
ejector mechanism click multiple times. Here's a video showing exactly
what it was doing:
I think I've found the problem. Maybe anyway. I had the CD player
section out of the radio chassis(only 4 screws hold the CD player
assembly into the radio chassis), and I made a discovery. The bottom of
the CD player has three ribbon cable connecting the bottom circuit
board to the rest of CD player. When I pulled them out of their
housings, I noticed that there were little dents in the contact
surfaces. From the digital speedo in the Mighty Caprice™, I know that
this can cause all sorts of odd behavior. The way these contacts work
is there is a spring loaded "finger" that presses on the cable contact
pad. Over time, the spring tension can dent the cable, making contact
spotty. I wiggled these cables around a bit, and reassembled
everything. Low and behold, it works! It's been a month now, and it's still working like it's supposed to. If it goes wonky again I've got a technique for filling in the
little dents that I'll try out. Here's a pic of the bottom of the CD
player section. You can see dents in the cable. All three of the
ribbon cables have similar little cable dents.


Console
Another flaw in the Gen II Vipers is the center console. It's a large molded PVC piece, but it's only got four tiny posts under it for support. If you lean on it too hard, it will crack. If it cracks and you don't fix it, the vinyl covering will begin to tear. Mine was cracked, and the vinyl was just starting to tear by the e-brake boot. Here you can clearly see the problem.
 After doing much research, I decided to use fiberglass as my main repair material. Polyester fiberglass resin does
stick to PVC, though it relies more heavily on a mechanical bond than a
chemical one. Plus, I had everything necessary already. The first
step was to do a whole lot pre cleaning. These consoles are notorious
for being covered in mold release compound. I used mineral spirits,
followed by acetone to clean the surface, then repeated the process a
couple times. With that done, I roughed up the whole bottom side with
some 36 grit sandpaper. This gives the resin some "tooth" to grab onto.
Then more cleaning. Then I planned out where I wanted to put the
fiberglass. I decided that since I'm doing it anyway, I may as well use
it for reinforcement too. I went shopping in my fiberglass scraps box
and laid out overlapping layers of mat where I wanted it.
After doing much research, I decided to use fiberglass as my main repair material. Polyester fiberglass resin does
stick to PVC, though it relies more heavily on a mechanical bond than a
chemical one. Plus, I had everything necessary already. The first
step was to do a whole lot pre cleaning. These consoles are notorious
for being covered in mold release compound. I used mineral spirits,
followed by acetone to clean the surface, then repeated the process a
couple times. With that done, I roughed up the whole bottom side with
some 36 grit sandpaper. This gives the resin some "tooth" to grab onto.
Then more cleaning. Then I planned out where I wanted to put the
fiberglass. I decided that since I'm doing it anyway, I may as well use
it for reinforcement too. I went shopping in my fiberglass scraps box
and laid out overlapping layers of mat where I wanted it.

With that done, I set the mat off to the side and started the lay up process. It's pretty simple, put a piece down, work the resin into it, work the bubbles out of it, and repeat. If you mix it right, you should have 20-30 minutes of work time before it sets up. When I had all the layers down down, I still had resin left so I added even more layers.
 All told, there's almost 1/4" of mat over the whole thing, with it approaching 3/8" thick in some areas. This thing is now almost solid enough to stand on. I also put a piece of plywood on the trans tunnel to add some support across the e-brake recess. No pics of that, but really, it's just plywood.


With that done, I set the mat off to the side and started the lay up process. It's pretty simple, put a piece down, work the resin into it, work the bubbles out of it, and repeat. If you mix it right, you should have 20-30 minutes of work time before it sets up. When I had all the layers down down, I still had resin left so I added even more layers.

Monday, September 2, 2013
Huh?
I had to remove my console to fix it. Like everything I've taken apart, this was a mess too. Seriously, how does someone get this much sand and dog fur under the console?!?


Saturday, August 31, 2013
Shave and a haircut
The door carpet on the Gen II Vipers leaves a lot to be desired. With use, it tends to pill up, and generally look awful. Such was the case with my car. A bit of trimming with some scissors, and it's back to looking like new :)


Exhaust gaskets
Even after reconnecting the cat delete pipes, I still had an exhaust leak. The connections between the manifolds and the pipes had an annoying tick tick tick. New gaskets were cheap and I found the easiest way to get to the connections was to remove the side sills and use some long extensions on the flange bolts. The bolts were rusted, so I used a little known trick to get them off without breaking. I took the car for a drive to get the exhaust good and hot, then melted some bee's wax onto the nuts and let it sit 15 minutes or so. It sounds stupid, but bee's wax is the best penetrating lubricant I've ever used(and I've tried them all). I've tested it back to back with other penetrating lubes, and it wins hands down. I got a block of bee's wax at my local Hobby Lobby for $10, and it's lasted for years. After letting the bee's wax soak in, the nuts came right off.
While you can get the pipe disconnected with the sill on, you can't get to the gasket well enough to scrape the surface clean. As expected, the gaskets came off easily, except for the small section that I can't really reach with a scraper. You guys who work on your own cars know exactly what I mean...

While you can get the pipe disconnected with the sill on, you can't get to the gasket well enough to scrape the surface clean. As expected, the gaskets came off easily, except for the small section that I can't really reach with a scraper. You guys who work on your own cars know exactly what I mean...

Saturday, August 24, 2013
Ooh, shiny
The paint on the Viper was in terrible shape. It was covered in scuffs and scratches, and the roof had been keyed. There were even spots where it looked like someone tried to clean gunk off with a Scotch Brite pad, leaving dull spots all over the body. There were also scrapes of white paint on top of the paint, whatever the previous owner slid into rubbed off onto the body. That came off with some mineral spirits. I used my trusty Harbor Freight 3" polisher and some 3M rubbing compound to get the paint nice and shiny again. The scratches that went all the way through the paint got some touch up paint dabbed in. It's not perfect, and most of the scratches were to deep to actually buff out, but they're much less noticeable than they were. Here are some of the worst areas:


Friday, August 23, 2013
The scoop
When the hood on the Viper was crunched, the scoop must have been cracked as well. Whomever started fixing it probably bought the cheapest scoop they could find. It's a Sapphire scoop from a later car. While I'm going to be painting the car anyway, I don't want to paint more than I have to, so the search is on for a blue/white scoop.


Sunday, August 18, 2013
Floor mats
The Viper didn't come with any floor mats. Since I didn't want to wear holes in the carpet, I had to get a set of mats. There are a lot of Viper specific mats on the market that have the Viper logo on them like the originals. These mats start at around $100 and go up from there. Now, I know it's a Viper, and anybody riding in it knows it's a Viper, so I didn't feel the need to spend that kind of money for simple floor mats with another logo. Instead, I went down to my local Farm and Fleet, and picked up a set of THESE. They don't fit perfect, but the fit is very good, they are decent quality, and are nice and cheap :)


The big clean
As I've previously mentioned, the former owner of this car had dogs. Two small long hair dogs to be exact. Apparently they loved to go on car rides because every square inch of this thing was covered in dog fur. Worse yet, the long fur was thoroughly woven into the carpet. Thank goodness they were clean dogs so it doesn't smell too. The interior also had a general "never been detailed" look about it too, and there were a couple splotches of white paint on the leather.

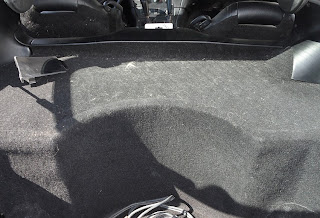 Seriously, how does someone get this much dog fur under the seat!?!

A full 8 hours of vacuuming and duct taping the carpet, and it was finally dog hair free. Then I spent another 4-5 hours scrubbing every interior surface with Simple Green, followed with a liberal dose of Mother's VLR detail spray. Mineral spirits was used to get the paint splotches off. It's mild enough that it won't harm the leather, and it got the job done. There's just something very satisfying about a (nearly) spotless interior :)


A full 8 hours of vacuuming and duct taping the carpet, and it was finally dog hair free. Then I spent another 4-5 hours scrubbing every interior surface with Simple Green, followed with a liberal dose of Mother's VLR detail spray. Mineral spirits was used to get the paint splotches off. It's mild enough that it won't harm the leather, and it got the job done. There's just something very satisfying about a (nearly) spotless interior :)


Wednesday, August 14, 2013
More than meets the eye
Aside from the crunched fiberglass, the worst part of the exterior of the Viper was the gas cap. Chrysler seems to have used the cheapest aluminum possible, and mine was very dull and oxidized. It was actually the only part of corroded aluminum on the thing, not bad for a car from the Pacific North West.
 Taking it off to repolish is easy, it's only four screws. I used my buffing wheel on the bench grinder with some jeweler's rouge to shine it back up. Rouge isn't the best compound for aluminum, but it gets the job done, and I had some handy. Because of the low quality of the aluminum, it won't ever get mirror shiny, but it buffed up very nicely. I didn't disassemble it, but I was able to get to all but the tightest nooks and crannies.

I'm about the age where Transformers was popular when I was growing up. In fact, it was my favorite show. I've always held a special regard for it, and consequently, all my vehicles get Autobot symbols. The Viper had to have one too, and the gas cap was the perfect place. The symbol is a red chrome vinyl decal I got on e-bay.


I'm about the age where Transformers was popular when I was growing up. In fact, it was my favorite show. I've always held a special regard for it, and consequently, all my vehicles get Autobot symbols. The Viper had to have one too, and the gas cap was the perfect place. The symbol is a red chrome vinyl decal I got on e-bay.

Tuesday, August 13, 2013
Hatch glass
This part of the project was one of the most nerve wracking things I've done in a very long time. A very common problem on the '96-'97 Vipers is the hatch glass. The glue that Chrysler used to attach the hardware to the glass wasn't very good. As a result, the steel parts separate from the glass. There are even reports of the glass blowing out at high speeds if you've got the windows down. If you catch it soon enough, you can squirt in some more adhesive, and be on your way. That wasn't what happened with this car. The bond started to break, and it was never repaired. As a consequence, the metal hinge strip got all twisted and mangled up. Judging by the scrapes on the body, it'd been like this for a very long time.

 With the hinge so bent, I couldn't just glue it back down. The hinge plate had to be removed. After careful consideration, and much internetting, I determined that a heat gun was the most likely tool to succeed at getting the glue off without damaging the glass. The first thing I did was tape around the edge of the steel so I'd have a guide as to where to put it back on. Then, using the heat gun and a plastic pry bar, I very carefully started peeling up the steel strip. Using my IR temp gun, I determined that the glue softens adequately at around 200°F. You've got to heat it slowly and evenly, a hot spot could cause the glass to shatter. With the strip off, you can see how much glue was actually there. Not much, it didn't even fully cover the surface.

The glue that was still on the glass was still very stuck, I felt like I might break the glass if I tried to get it all off. Instead of removing it, I very carefully ground it down with an angle grinder. I wasn't trying to remove it so much as to rough it up to give the new adhesive something to grab onto. With the steel plate off, I could get the bend straightened out and match the curve of the strip to the glass.

With the glass clean, and steel straightened, it was time to glue it back on. I couldn't find a consensus on which glue to use, and the factory replacement glue is only available in big drums. For adhesive, I chose 3M's Windo-Weld, available at most auto parts stores. It's black, so it will help hide any knicks or scrapes in the black etching on the glass. Actually gluing it back on was the most nerve wracking part. Ideally, you should have a uniform thickness of adhesive for the best bond. The steel has dimples in it to maintain that thickness. The problem is that window urethane is thick, and doesn't squish out easily. To get the proper "squish", I used C-clamps to clamp the strip down with even pressure. C-clamps on glass = could shatter with just slightly too much pressure. I slowly clamped the clamps every inch or so to work the excess urethane out, then spaced them evenly until it set. I also use the blanket the glass is sitting on to keep the clamps off the glass it's self.
 If you've used the right amount of glue, you should get a fairly uniform squish out. Remember the tape we put on? Aside from helping with alignment, it also helps keep the mess to "big" instead of "huge." You'll want to smooth the seam with your finger, a putty knife, or something like that, then wipe up any remaining urethane. While it's still soft, you can smooth it out with mineral spirits. One it's smoothed to your satisfaction, you can peel up the tape, and you should have a nice uniform edge.
In retrospect, I should have taped the strip too, the C-clamps left very faint impressions on the black paint. I let it sit clamped for 48 hours to give it ample time to dry before reinstalling. Another thing too, urethane is messy. Very messy. It's a good idea to have plenty of paper towels, mineral spirits, lacquer thinner, and latex gloves on hand. While it's soft, mineral spirits and lacquer thinner will dissolve it, one it sets, it'll have to be scraped off with a razor blade.


The glue that was still on the glass was still very stuck, I felt like I might break the glass if I tried to get it all off. Instead of removing it, I very carefully ground it down with an angle grinder. I wasn't trying to remove it so much as to rough it up to give the new adhesive something to grab onto. With the steel plate off, I could get the bend straightened out and match the curve of the strip to the glass.

With the glass clean, and steel straightened, it was time to glue it back on. I couldn't find a consensus on which glue to use, and the factory replacement glue is only available in big drums. For adhesive, I chose 3M's Windo-Weld, available at most auto parts stores. It's black, so it will help hide any knicks or scrapes in the black etching on the glass. Actually gluing it back on was the most nerve wracking part. Ideally, you should have a uniform thickness of adhesive for the best bond. The steel has dimples in it to maintain that thickness. The problem is that window urethane is thick, and doesn't squish out easily. To get the proper "squish", I used C-clamps to clamp the strip down with even pressure. C-clamps on glass = could shatter with just slightly too much pressure. I slowly clamped the clamps every inch or so to work the excess urethane out, then spaced them evenly until it set. I also use the blanket the glass is sitting on to keep the clamps off the glass it's self.

In retrospect, I should have taped the strip too, the C-clamps left very faint impressions on the black paint. I let it sit clamped for 48 hours to give it ample time to dry before reinstalling. Another thing too, urethane is messy. Very messy. It's a good idea to have plenty of paper towels, mineral spirits, lacquer thinner, and latex gloves on hand. While it's soft, mineral spirits and lacquer thinner will dissolve it, one it sets, it'll have to be scraped off with a razor blade.
Subscribe to:
Posts (Atom)