
Saturday, August 31, 2013
Shave and a haircut
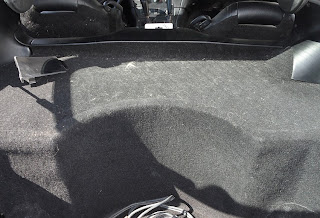
The door carpet on the Gen II Vipers leaves a lot to be desired. With use, it tends to pill up, and generally look awful. Such was the case with my car. A bit of trimming with some scissors, and it's back to looking like new :)

Exhaust gaskets
Even after reconnecting the cat delete pipes, I still had an exhaust leak. The connections between the manifolds and the pipes had an annoying tick tick tick. New gaskets were cheap and I found the easiest way to get to the connections was to remove the side sills and use some long extensions on the flange bolts. The bolts were rusted, so I used a little known trick to get them off without breaking. I took the car for a drive to get the exhaust good and hot, then melted some bee's wax onto the nuts and let it sit 15 minutes or so. It sounds stupid, but bee's wax is the best penetrating lubricant I've ever used(and I've tried them all). I've tested it back to back with other penetrating lubes, and it wins hands down. I got a block of bee's wax at my local Hobby Lobby for $10, and it's lasted for years. After letting the bee's wax soak in, the nuts came right off.
While you can get the pipe disconnected with the sill on, you can't get to the gasket well enough to scrape the surface clean. As expected, the gaskets came off easily, except for the small section that I can't really reach with a scraper. You guys who work on your own cars know exactly what I mean...

While you can get the pipe disconnected with the sill on, you can't get to the gasket well enough to scrape the surface clean. As expected, the gaskets came off easily, except for the small section that I can't really reach with a scraper. You guys who work on your own cars know exactly what I mean...

Saturday, August 24, 2013
Ooh, shiny
The paint on the Viper was in terrible shape. It was covered in scuffs and scratches, and the roof had been keyed. There were even spots where it looked like someone tried to clean gunk off with a Scotch Brite pad, leaving dull spots all over the body. There were also scrapes of white paint on top of the paint, whatever the previous owner slid into rubbed off onto the body. That came off with some mineral spirits. I used my trusty Harbor Freight 3" polisher and some 3M rubbing compound to get the paint nice and shiny again. The scratches that went all the way through the paint got some touch up paint dabbed in. It's not perfect, and most of the scratches were to deep to actually buff out, but they're much less noticeable than they were. Here are some of the worst areas:


Friday, August 23, 2013
The scoop
When the hood on the Viper was crunched, the scoop must have been cracked as well. Whomever started fixing it probably bought the cheapest scoop they could find. It's a Sapphire scoop from a later car. While I'm going to be painting the car anyway, I don't want to paint more than I have to, so the search is on for a blue/white scoop.


Sunday, August 18, 2013
Floor mats
The Viper didn't come with any floor mats. Since I didn't want to wear holes in the carpet, I had to get a set of mats. There are a lot of Viper specific mats on the market that have the Viper logo on them like the originals. These mats start at around $100 and go up from there. Now, I know it's a Viper, and anybody riding in it knows it's a Viper, so I didn't feel the need to spend that kind of money for simple floor mats with another logo. Instead, I went down to my local Farm and Fleet, and picked up a set of THESE. They don't fit perfect, but the fit is very good, they are decent quality, and are nice and cheap :)


The big clean
As I've previously mentioned, the former owner of this car had dogs. Two small long hair dogs to be exact. Apparently they loved to go on car rides because every square inch of this thing was covered in dog fur. Worse yet, the long fur was thoroughly woven into the carpet. Thank goodness they were clean dogs so it doesn't smell too. The interior also had a general "never been detailed" look about it too, and there were a couple splotches of white paint on the leather.

 Seriously, how does someone get this much dog fur under the seat!?!

A full 8 hours of vacuuming and duct taping the carpet, and it was finally dog hair free. Then I spent another 4-5 hours scrubbing every interior surface with Simple Green, followed with a liberal dose of Mother's VLR detail spray. Mineral spirits was used to get the paint splotches off. It's mild enough that it won't harm the leather, and it got the job done. There's just something very satisfying about a (nearly) spotless interior :)


A full 8 hours of vacuuming and duct taping the carpet, and it was finally dog hair free. Then I spent another 4-5 hours scrubbing every interior surface with Simple Green, followed with a liberal dose of Mother's VLR detail spray. Mineral spirits was used to get the paint splotches off. It's mild enough that it won't harm the leather, and it got the job done. There's just something very satisfying about a (nearly) spotless interior :)


Wednesday, August 14, 2013
More than meets the eye
Aside from the crunched fiberglass, the worst part of the exterior of the Viper was the gas cap. Chrysler seems to have used the cheapest aluminum possible, and mine was very dull and oxidized. It was actually the only part of corroded aluminum on the thing, not bad for a car from the Pacific North West.
 Taking it off to repolish is easy, it's only four screws. I used my buffing wheel on the bench grinder with some jeweler's rouge to shine it back up. Rouge isn't the best compound for aluminum, but it gets the job done, and I had some handy. Because of the low quality of the aluminum, it won't ever get mirror shiny, but it buffed up very nicely. I didn't disassemble it, but I was able to get to all but the tightest nooks and crannies.

I'm about the age where Transformers was popular when I was growing up. In fact, it was my favorite show. I've always held a special regard for it, and consequently, all my vehicles get Autobot symbols. The Viper had to have one too, and the gas cap was the perfect place. The symbol is a red chrome vinyl decal I got on e-bay.


I'm about the age where Transformers was popular when I was growing up. In fact, it was my favorite show. I've always held a special regard for it, and consequently, all my vehicles get Autobot symbols. The Viper had to have one too, and the gas cap was the perfect place. The symbol is a red chrome vinyl decal I got on e-bay.

Tuesday, August 13, 2013
Hatch glass
This part of the project was one of the most nerve wracking things I've done in a very long time. A very common problem on the '96-'97 Vipers is the hatch glass. The glue that Chrysler used to attach the hardware to the glass wasn't very good. As a result, the steel parts separate from the glass. There are even reports of the glass blowing out at high speeds if you've got the windows down. If you catch it soon enough, you can squirt in some more adhesive, and be on your way. That wasn't what happened with this car. The bond started to break, and it was never repaired. As a consequence, the metal hinge strip got all twisted and mangled up. Judging by the scrapes on the body, it'd been like this for a very long time.

 With the hinge so bent, I couldn't just glue it back down. The hinge plate had to be removed. After careful consideration, and much internetting, I determined that a heat gun was the most likely tool to succeed at getting the glue off without damaging the glass. The first thing I did was tape around the edge of the steel so I'd have a guide as to where to put it back on. Then, using the heat gun and a plastic pry bar, I very carefully started peeling up the steel strip. Using my IR temp gun, I determined that the glue softens adequately at around 200°F. You've got to heat it slowly and evenly, a hot spot could cause the glass to shatter. With the strip off, you can see how much glue was actually there. Not much, it didn't even fully cover the surface.

The glue that was still on the glass was still very stuck, I felt like I might break the glass if I tried to get it all off. Instead of removing it, I very carefully ground it down with an angle grinder. I wasn't trying to remove it so much as to rough it up to give the new adhesive something to grab onto. With the steel plate off, I could get the bend straightened out and match the curve of the strip to the glass.

With the glass clean, and steel straightened, it was time to glue it back on. I couldn't find a consensus on which glue to use, and the factory replacement glue is only available in big drums. For adhesive, I chose 3M's Windo-Weld, available at most auto parts stores. It's black, so it will help hide any knicks or scrapes in the black etching on the glass. Actually gluing it back on was the most nerve wracking part. Ideally, you should have a uniform thickness of adhesive for the best bond. The steel has dimples in it to maintain that thickness. The problem is that window urethane is thick, and doesn't squish out easily. To get the proper "squish", I used C-clamps to clamp the strip down with even pressure. C-clamps on glass = could shatter with just slightly too much pressure. I slowly clamped the clamps every inch or so to work the excess urethane out, then spaced them evenly until it set. I also use the blanket the glass is sitting on to keep the clamps off the glass it's self.
 If you've used the right amount of glue, you should get a fairly uniform squish out. Remember the tape we put on? Aside from helping with alignment, it also helps keep the mess to "big" instead of "huge." You'll want to smooth the seam with your finger, a putty knife, or something like that, then wipe up any remaining urethane. While it's still soft, you can smooth it out with mineral spirits. One it's smoothed to your satisfaction, you can peel up the tape, and you should have a nice uniform edge.
In retrospect, I should have taped the strip too, the C-clamps left very faint impressions on the black paint. I let it sit clamped for 48 hours to give it ample time to dry before reinstalling. Another thing too, urethane is messy. Very messy. It's a good idea to have plenty of paper towels, mineral spirits, lacquer thinner, and latex gloves on hand. While it's soft, mineral spirits and lacquer thinner will dissolve it, one it sets, it'll have to be scraped off with a razor blade.


The glue that was still on the glass was still very stuck, I felt like I might break the glass if I tried to get it all off. Instead of removing it, I very carefully ground it down with an angle grinder. I wasn't trying to remove it so much as to rough it up to give the new adhesive something to grab onto. With the steel plate off, I could get the bend straightened out and match the curve of the strip to the glass.

With the glass clean, and steel straightened, it was time to glue it back on. I couldn't find a consensus on which glue to use, and the factory replacement glue is only available in big drums. For adhesive, I chose 3M's Windo-Weld, available at most auto parts stores. It's black, so it will help hide any knicks or scrapes in the black etching on the glass. Actually gluing it back on was the most nerve wracking part. Ideally, you should have a uniform thickness of adhesive for the best bond. The steel has dimples in it to maintain that thickness. The problem is that window urethane is thick, and doesn't squish out easily. To get the proper "squish", I used C-clamps to clamp the strip down with even pressure. C-clamps on glass = could shatter with just slightly too much pressure. I slowly clamped the clamps every inch or so to work the excess urethane out, then spaced them evenly until it set. I also use the blanket the glass is sitting on to keep the clamps off the glass it's self.

In retrospect, I should have taped the strip too, the C-clamps left very faint impressions on the black paint. I let it sit clamped for 48 hours to give it ample time to dry before reinstalling. Another thing too, urethane is messy. Very messy. It's a good idea to have plenty of paper towels, mineral spirits, lacquer thinner, and latex gloves on hand. While it's soft, mineral spirits and lacquer thinner will dissolve it, one it sets, it'll have to be scraped off with a razor blade.
Sunday, August 11, 2013
The Fast and Cheap
One of my myriad of projects is the Fast and Cheap. It's my attempt to get an RC car up to 100 MPH, and do it on a budget. Anyone can build a fast car, anyone can build a cheap car, doing both is the challenge for me. If you want to read the entire F&C Saga, here's a very big thread about it on the Ultimate RC forum:
http://www.ultimaterc.com/forums/showthread.php?t=171392
Well, I finally had time for some test runs. Needless to say, it didn't end well. At around 40-45 MPH, the car spun out then went airborne. On the plus side, I got to 40 MPH and hadn't even gotten to half throttle yet :)
http://www.ultimaterc.com/forums/showthread.php?t=171392
Well, I finally had time for some test runs. Needless to say, it didn't end well. At around 40-45 MPH, the car spun out then went airborne. On the plus side, I got to 40 MPH and hadn't even gotten to half throttle yet :)
Friday, August 9, 2013
The little things
When I got the Viper, it had smooth silicone tube installed in place of the stock accordion looking intake tubes. Who ever put them on must have bought the longest hose clamps they could find. They were about 4" too long, and just looked bad. I can't stand unsightly hose clamps, and it'd been bothering me since the day I got it. IMO, sloppy hose clamps can ruin a whole engine compartment.
 I stopped down to the local Farm and Fleet, and bought a set of stainless T-clamps. They look 1000 times better.
 While I was changing the clamps, I noticed a small but very important thing. The top alternator bolt was missing. Fortunately, the alternator could rest on the bracket, or this might have ended very badly. Be sure to look things over very carefully when you buy a used car...


Sunday, August 4, 2013
Brakes
It said right in the e-bay listing that the Viper needed front brakes. When I got it, they did sound a bit grindy, so brakes were at the top of the to do list. I got some new pads and pulled the fronts brakes apart, this is what I found:
 He wasn't kidding when he said it needed brakes! This is what original brake pads look like after 44,000 miles. Two of the pads were down to the metal backing. Fortunately the rotors weren't too scored up and I was able to turn them clean. Now where did all that pad material go? Found it!
 I don't think the back sides of the wheels on this car have ever been cleaned...


Dipped the Harley
The old Shovelhead was purple when I got it. It was a nice color, just purple. Then I bought some saddle bags for it. Since I'd planned on painting the bike anyway, I just rattle canned them black temporarily. That was 8 years ago. I've hemmed and hawed over what color to paint is for a few years now, I just can't make up my mind. Then just recently, Plasti-Dip introduced a line on metallics. One of the colors consistently towards the top of my list is Anthracite, and conveniently, Plasti-Dip now makes one. Three cans later, I've got a gray bike :)


Exhaust
The previous owner described the exhaust as "Nasty." He was right. It was terrible. At anything above idle, it had the classic UPS truck sound. After pulling the side sills, this is what I found. The cats had been replaced with straight pipe, and that pipe wasn't connected to the head pipes. Basically, it was running open exhaust dumped into the side sills. Judging by the amount of carbon under the sills, he'd been running it for awhile. One of the very first things I did was reconnect those pipes. The pipes were shoved into the resonators so far that even with my Dad's help, it was a fight to get them back in place.


Friday, August 2, 2013
Plasti-stripes
When I got my car, someone had already done some fixing on the hood(and not very well I might add). There was a big primer spot on it covering the repair. The repair area extended over the stripes, and stood out like a sore thumb.
 I decided to do a quick fix until I get into major bodywork. Since this
is only a temporary job, I'm using Plasti-Dip. If you're not familiar
with Plasti-Dip, it's a spray on rubber coating available at hardware
stores and online at places like www.dipyourcar.com. It comes in a variety of colors and can be used for anything from cars to tools. Plasti-dip's best feature
is that while it sticks well, it's very to remove. You just start
pulling at an edge, and the Dip peels off in big sheets leaving the
original finish untouched. Since it's not a permanent coating, I wasn't too concerned about overspray so I didn't have to mask the whole car.
I decided to do a quick fix until I get into major bodywork. Since this
is only a temporary job, I'm using Plasti-Dip. If you're not familiar
with Plasti-Dip, it's a spray on rubber coating available at hardware
stores and online at places like www.dipyourcar.com. It comes in a variety of colors and can be used for anything from cars to tools. Plasti-dip's best feature
is that while it sticks well, it's very to remove. You just start
pulling at an edge, and the Dip peels off in big sheets leaving the
original finish untouched. Since it's not a permanent coating, I wasn't too concerned about overspray so I didn't have to mask the whole car.
 Most colors of Plasti-Dip cover well, but the white is pretty thin. It took a whole can to cover the blue primer spot. I also blended it back so I didn't end up with a hard tape line towards the top.
 One of the tricks to Dip is that you need to remove the masking right away. If you let the Dip dry, it will start peeling off as you remove the masking tape. Once it's had a few days to throughly dry, using a product like Meguiar's Ultimate Quick Wax will greatly increase it's durability. Here she is, stripes one again continuous. Any overspray on the body simply wipes off. The color is slightly off, and there's still obviously a primer spot, but the overall look of the car is much improved by this one little detail :)


Subscribe to:
Posts (Atom)