If you're not familiar with the Kawasaki H series of bikes, they were all three cylinder two-strokes, ranging in size from 250cc to 750cc. The first of the series, the H1A, was 500cc's. When the original H1 debuted in 1969, it was, for all intents and purposes, the world's first superbike. No other production bike could match it's performance. Handling was atrocious and the brakes were marginal at best, but when you got on the gas in a straight line, everything else was left behind. While sluggish down low, when it hit the powerband it took off like a missile with eyeball melting acceleration. It was so quick that it was dubbed the Mach III.
My bike story started like so many others, a friend's neighbor had this old bike sitting in a shed. I'd never even heard the term "triple" when I first went to look at it. I wasn't all that impressed at first glance, but I wanted a new project and have a fondness for Kawasaki two strokes, so it followed me home for the princely sum of $450. It wasn't until I later did some research that I realized I'd acquired much more than a generic 70's Japanese motorcycle. Since I'd always like the Cafe Racer style, and I can never leave well enough alone I decided to build a custom Cafe bike instead or a factory restoration. I also I wanted to see how cost effective I could keep it, just because.
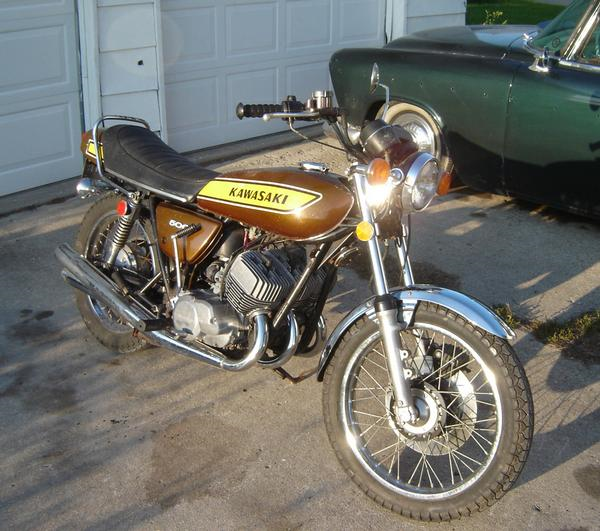
Here's how it looked when I got it home, dusty, dirty, hadn't been ridden in 15 years:

First thing I did, before I even washed, it was pull the giant windshield off :D Then I cleaned it, it actually cleaned up pretty good. I cleaned the carbs and got it running without too much fuss. Not bad for 35 years old and 18,000 miles:
I discovered that I sit differently on it whether I'm pretending or actually riding. Since I'm going to make a seat and rear fender for it, I had to know where I'd be sitting on it with the bars I intend to make. I haven't found a supplier for the stainless tubing I'll need, so I had to make some mock up bars. It turns out that 1/2" Schedual 40 pipe is just slightly under the OD required, and I happened to have a piece laying in the garage. This is just a working mockup, I'll shorten the wires as necessary later on.

Having more time than money and being a pretty decent sheetmetal fabricator, my first thought was to make/modify a tank to suit my needs. While shopping a for a suitable donor, I discovered that a few Japanese production tanks came styled the way I want. I ended up finding a deal on e-bay of all places on a 1980 Honda CX500 tank. The best part of this tank, a petcock with a real actual "OFF" position unlike the H1's sucky vacuum petcock(pun intended).


One thing that needed immediate changing with the new tank was the fuel lines. The stock H1 petcock had three fuel lines coming off of it, one for each carb. The CX500 tank only had one. So, I made a fuel splitter. I started with a chunk of aluminum scrap. I drilled a hole most of the way down it's length, then adjoining holes down one side and tapped them.


I also added some new Bridgestone BT45 tires and a Kawasaki Ninja EX500 front brake caliper. The dual piston EX caliper only requires a simple adapter bracket to be made, and is a HUGE improvement over the stock front caliper. Neither of these pictures are mine, but you can see the difference.
Stock:


No comments:
Post a Comment